Black Hat and Tie Bottle Topper

Friday, December 28, 2018

It's almost New Year's Eve! Are you looking for a host/hostess gift? Here is a cute and easy way to personalize a bottle of wine. It's also great for a wedding or bridal shower. You can also download the pdf of this pattern on Ravelry here.

Black Hat and Tie Bottle Topper

Materials
Size H hook
100% cotton yarn, black


Abbreviations in US terms:
Ch - chain
St - stitch
SlSt - slip stitch
SC - single crochet
HDC - half double crochet
DC - double crochet
BLO - back loop only
SC2tgr - single crochet 2 together


Black Tie Pattern
Ch 16 and SlSt to beginning Ch to make a circle.
Row 1: CH 1. SC in the same St and the next St. HDC in each of the next 5 Sts. SC in the next 2 Sts. HDC in each of the next 5 Sts. SC in the next 2 Sts and SL ST to beginning St. (16)
Row 2: Repeat round 1.
Row 3: CH 1. SC in the same St and the next St. HDC in the next 3 Sts. HDC in BLO of the next 2 Sts. SC in BLO of the next 2 Sts. HDC in BLO of the next 2 Sts. HDC in each of the next 3 Sts. SC in the next 2 Sts and SlSt to the beginning St. Cut off. Weave in ends. (16)
Row 4: CH 30. SL ST to first Ch to form a circle. SlSt in each Ch around and to the beginning SlSt. Cut off. Weave in ends.

Finishing:
Put the circle from row 4 around the bowtie. Slip one end of the circle through the other end of the circle and pull it tight. It will form the middle of the bowtie and create a loop that will go over the top of the bottle.


Black Hat Pattern
Magic circle CH 1, 8 SC in magic circle. SlSt to first SC. (8)
Row 1: Ch1. 2 HDC in each St around. SlSt to first Ch 1. (16)
Row 2: Ch 1. HDC in BLO of each St around. SlSt to first Ch 1. (16)
Row 3: Ch 1. SC2tgr, HDC in each of the next 6 Sts. SC2tgr. HDC in each of the next 6 Sts. SlSt to first Ch 1. (14)
Row 4: Ch 1. HDC in each St around. SlSt to first SC. (14)
Row 5: Ch 1. SC2tgr, HDC in each of the next 5 Sts. SC2tgr. HDC in each of the next 5 Sts. SlSt to first Ch 1. (12)

Row 6: Ch 1. 2 HDC in BLO of each St around. SlSt to first Ch 1. (24) Cut off. Weave in ends.

Happy New Year! Enjoy!
0

5 Days of Stocking Stuffers: Large Gift Card Holders

Friday, December 21, 2018

Here is the last idea I have to share with you in this series: 5 Days of Stocking Stuffers! We're getting close to the big day now, but there is still time to crochet these gift card holders. I bought gift cards from the grocery store on those stands that have gift cards from several restaurants, stores, and more. They are packaged differently than your typical gift card, and so they are much bigger. The gift cards for Xbox points that I bought are 3.5 inches x 5.5 inches in size. I first used this really cute pattern by Cindy Kromminga to make the Crochet Reindeer Gift Card Holder. I had to adjust the size to fit a bigger gift card, so it doesn't look exactly like hers, but it's still cute. I had more than one gift card to give, so I decided to design my own crochet pattern for a snowman. That is the pattern I am going to share with you today. You can also download the free pdf for this pattern on Ravelry by clicking here.


Large Snowman Gift Card Holder


Materials:
White yarn 100% cotton, medium weight 4
Black yarn 100% cotton, medium weight 4
Size H hook
Tapestry needle
2 Black wooden beads (eyes)
1 carrot button

Abbreviations  
Ch - chain
SlSt - slip stitch
St - stitch
SC - single crochet

*Note: This pattern is for a gift card that is 3.5 inches by 5.5 inches, which is bigger than a typical gift card. This holder is for the variety of gift cards that can be purchased at a grocery store. You can easily adjust the pattern for any size by adjusting the size of the beginning chain to fit your gift card.

Pattern
With white, Ch 28. SlSt to beginning Ch to make a circle. Ch 1. (The Ch 1 will be the fold on the side of the gift card holder.)
*Note: Check to see if your gift card will slide inside this circle. If you have a regular sized gift card, this circle will be too big. Adjust the number of Ch to fit your gift card.

Row 2-14: Working in continuous rounds, SC in each St around.  At the end of round 14, Ch 1, skip a stitch, SlSt to next stitch. Cut the white yarn and weave in ends.
*Note: If making a smaller gift card, SC in white about ¾ the size of the gift card.

Rows 15: With black yarn, SC onto the side of the gift card holder where it folds. Ch 4. Turn. SC in second Ch from hook and in each Ch across (3). This forms the brim of the hat on the right side. Continue to SC in the next 14 Sts that are part of the circle. Ch 4. Turn. SC in second Ch from hook and in each Ch across (3). This forms the brim of the hat on the left side. Continue to SC in next 14 Sts that are part of the circle. (The 14th St is on top of the first SC made in black yarn.)

Rows 16: SC in the 3 Sts that make the brim of the hat on the right side. Ch 1. Turn. SC in the 3 Sts that make the brim of the hat and the next 14 Sts that are part of the circle. SC in each of the 3 Sts that make the brim of the hat on the left side. Ch 1. Turn. SC in the 3 Sts that make the brim of the hat and the next 13 Sts that are part of the circle.

Rows 16 - 18: SC in each St that is part of the circle only (28 in each round). DO NOT include the brim of the hat. At the end of row 18, Ch 1, skip the next St, and SlSt into the next St. Cut off. Weave in ends.

Finishing: Using white yarn, SlSt the bottom of the gift card holder together. Cut off. Weave in ends. Attach the wooden bead eyes and the carrot button nose with black yarn. Stitch a smile with black yarn and a tapestry needle.

I hope you enjoyed 5 Days of Stocking Stuffers! Have a Merry Christmas!

0

5 Days of Stocking Stuffers: Doggy Poo Bag Holder

Monday, December 17, 2018


I have been sharing practical, handmade stocking stuffer ideas you can easily make yourself for the holidays! Here is the fourth idea in this series, 5 days of stocking stuffers. Try crocheting something that every dog owner needs–a Doggy Poo Bag Holder! These little holders have doggy poo bags inside, and they clip onto your dog's collar. Now you can have a poo bag right at your fingertips while taking your dog on a walk! I've seen patterns for these, but they have been very big and bulky which seems inconvenient. I decided to try my own pattern using these small, compact poo bags from Amazon and 2 inch carabiners.

These are affiliate links, which means I do get a small commission if you use these links to buy, but at no cost to you. These are the same products I used to make it myself.


Doggy Poo Bag Holder

Materials
Size H hook
100% cotton yarn medium weight
2 inch Carabiner
Charm/Bead (optional)

Abbreviations in US terms:
Ch - chain
St - stitch
SlSt - slip stitch
SC - single crochet
DC - double crochet
BLO - back loop only

Pattern
Ch 10 and SlSt to beginning Ch to make a circle.
Row 1: CH 2. 18 DC in the circle. SlSt to beginning Ch 1. (18)
Row 2: Ch 1. SC in BLO in each St around. SlSt to beginning Ch 1. (18)
Row 3 - 11: Begin working in continuous rounds. Do not join. SC in each St around.
Row 12: SC in BLO of each St around. (18)
Row 13: (I usually put the roll of bags in and pull a bag out of the bottom before doing this row. It’s not necessary, but I think it’s easier.) SlSt in each St around. Cut off. Weave in ends.
Finishing: Cut a piece of string about 8 - 10 inches long. Weave it through row 12 and tie in a bow. This can be tightened as the bags are used so the roll does not fall out as the roll gets smaller. You can also add a fun bead or charm on the front. Slide the carabiner through 3 rows in the back near the top. To use your Doggy Poo Bag Holder, clip the carabiner onto your dog’s leash at the handle or down near your dog’s head. When on a walk, you now have a poo bag right at your fingertips! Enjoy!

If you liked this stocking stuffer idea, check out the other ideas in this series: 5 Days of stocking stuffers.

0

5 Days of Stocking Stuffers: Ice Scraper Mitt

Friday, December 14, 2018


It's time for the third stocking stuffer idea! I'm sharing 5 ideas in this series that you can easily make yourself to add a special, handmade touch to those smaller gifts for neighbors, teachers, or a last minute thoughtful and practical stocking stuffer. This pattern is not mine, but it's a great idea! The Ice Scraper Mitt pattern comes from Stitches N Scraps. An ice scraper with a warm mitt to keep your hand warm as you scrape is a thoughtful, practical gift for a man or a woman. They work up quickly, and it's easy to fit them to any ice scraper. I used different yarn than the pattern calls for in black, white, and gray, and it turned out really well. Here is the yarn and the scraper I used:
These are affiliate links, which means I do get a small commission if you use these links to buy, but at no cost to you. These are the same products I used to make it myself.


I also made these gift tags to go with it! You can download a free copy by subscribing to my blog.


Good luck finishing up your handmade gifts! If you liked this stocking stuffer idea, check out the pattern for the Santa Hat for Lotion Bottle, and Earbud/Cord Organizers. Don't forget to check back for more new stocking stuffer ideas!


0

5 days of Stocking Stuffers: Earbud/Cord Organizer

Wednesday, December 12, 2018


Are you ready for another practical, handmade stocking stuffer that makes a great gift for neighbors, teachers, or a last minute thoughtful stocking stuffer? I'm sharing 5 ideas you can easily make yourself to add a special handmade touch to those smaller gifts. Try crocheting the second stocking stuffer idea in this 5 part series: Earbud/cord organizers! I've seen these around lately, and I decided to try making my own, and now I'm happy to share the pattern with you! You can also download the pdf pattern on Ravelry by clicking here.

If you own a smart phone, then you have a lot of cords. Whether you are traveling or just throwing the cords in your purse or backpack so you don't run out of battery before the day is over, these little cord organizers are perfect! I had a craft show recently, and they were snapped up like hot cakes! They're fairly easy to make, and you can make them for a boy or girl. That's a handy gift for teenagers!


Earbud/Cord Organizer


Materials:

Size H hook

100% cotton yarn

Button

Abbreviations in US terms:

Ch - chain
St - stitch
SC - single crochet
SlSt - slip stitch

Pattern:
Ch 7. Turn.
Row 1: SC in 2nd Ch from hook and each Ch across (6).
Rows 2 - 8: Ch 1, Turn. SC in each St across (6).
Row 9: Ch 5. SlSt to the 6th SC on the opposite side forming the button hole. SC down the side of your work and all the way around, including the 6 Ch stitches on the button hole. SlSt back in the first SlSt. Cut off. Weave in ends.
Finishing:
Attach a button in the middle according to the picture, approximately the 2nd or 3rd row from the bottom. The button is the fun part that makes these little gifts unique, so look for one that fits the personality of the person to whom you're giving the gift. Enjoy!

If you liked this gift idea, check out the pattern for the Santa Hat for Lotion Bottle; the first handmade gift idea in: 5 Days of Stocking Stuffers! Be sure to check back for more handmade stocking stuffer ideas!

2

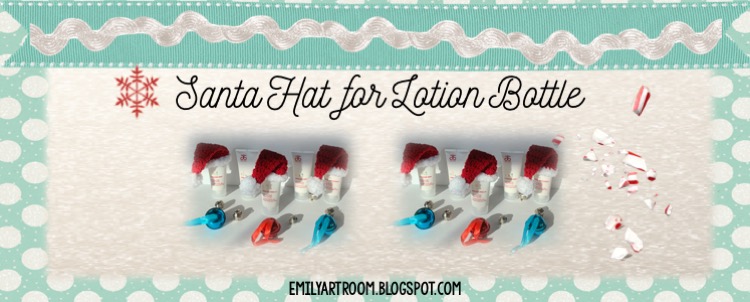
5 Days of Stocking Stuffers: Santa Hat for Lotion Bottle

Saturday, December 8, 2018


It's crunch time! I've carved my gift list down to those little stocking stuffers or small gifts for neighbors, co-workers, teachers, or something small that adds that thoughtful, personal touch to a stocking stuffer. How about you?

I have 5 ideas you can easily make yourself to add a special handmade touch to those smaller gifts. Here is the first stocking stuffer idea in this 5 part series. Be sure to check back for more!

Santa Hat for Hand Lotion

Hand lotion is always a great gift for anyone, especially this time of year when it gets so dry. To make it a little more personalized, try adding a cute little handmade crocheted Santa hat to the bottle to dress it up!

I've been making a lot of Santa hats for babies, kids and adults, and I've come up with a pattern that looks really cute on a travel size hand lotion bottle. The lotion bottles I am using are from Arbonne's Holiday Collection. They are THE BEST hand lotion, and they smell great! They have sold out of the holiday smells for this year, but you can still get the regular shea butter lotion here, which is still a great lotion.

If you purchase hand lotion from Bath and Body Works, or even the grocery store, I'm sure the sizing will be similar for a travel-sized lotion bottle. To check, after you chain 20 and SlSt into a ring, slide it over your lotion bottle to make sure it will fit before continuing the pattern.

This pattern is also available on Ravelry: https://www.ravelry.com/patterns/library/santa-hat-for-lotion-bottle


Santa Hat for Hand Lotion


Materials:

Size G hook
Red yarn - medium weight 4 (small amount needed)
White Bernat Pipsqueak Yarn (small amount needed)
Clover pom-pom maker (yellow)
Travel Hand Lotion bottle Arbonne shea butter lotion


Abbreviations in US terms:

Ch - chain
St - stitch
SC - single crochet
DC - double crochet
DC2tgr - double crochet 2 together
SlSt - slip stitch


Santa Hat Pattern:

Ch 20, SlSt to first Ch to make a ring.
Row 2: Ch 2. DC in each stitch around. Join to beginning Ch 2 with a SlSt (20).
Row 3: Ch 2. *DC2tgr, one DC in each of the next 2 stitches.*   Repeat from * and SlSt to beginning Ch 2 (15).
Row 4: Ch 2.   DC in each stitch around. SlSt to beginning Ch 2 (15).
Row 5: Ch 2. *DC2tgr, one DC in each of the next 3 stitches.*  Repeat from * and SlSt to beginning Ch 2 (12).
Row 6: Ch 2. DC in each stitch around. SlSt to beginning Ch 2 (12)
Row 7: Ch 2. *DC2tgr, one DC in each of the next 3 stitches.* Repeat from * ending with DC2tgr and SlSt to beginning Ch 2 (9).
Row 8: Ch 2. DC in each stitch around. SlSt to beginning Ch 2 (9).
Row 9: Ch 2. DC2tgr, one DC in each of the next 2 stitches. DC2tgr, one DC in each of the next 3 stitches. SlSt to beginning Ch 2 (7).
Row 10: Ch 2. DC in each stitch around. Sl st to beginning Ch 2. (7)
Row 11: Ch 2. DC2tgr 3 times, DC in next stitch. Sl st to beginning Ch 2 (4). Cut yarn. Weave in ends.
Row 12: Switch to white Bernat Pipsqueak yarn. Join to the bottom of the santa hat. Ch 1. SC in each stitch around. SlSt to beginning Ch 1 (20).
Row 13: Ch 1. SC in each stitch around. SlSt to beginning Ch 1 (20). Cut yarn. Weave in ends.
Finishing: Using white Bernat Pipsqueak yarn, make a pompom. I used the yellow clover pompom maker. Tie to the end of the santa hat. Add the hat onto your lotion bottle!


Merry Christmas! Be sure to check back for more stocking stuffer ideas!


0

Credits

Powered by Blogger.